Backlighting
Are you ready to dive in a bit deeper today? Determined to capture a sports image that is not just good, but great? Well I have a treat for you.
If you have read some of my other photo tips, you have heard me mention the angle in which you photograph the action on the field. When photographing outdoor sports, don't only position yourself where the action is coming towards you––consider your position in relation to the sun angle. That is the element I would like to discuss today.
When I first arrive on the field to photograph an outdoor sporting event, I tend to place myself where I can get a clear shot of the action. I also want my photos to have the most impact, and that is where sun angle comes into play. I have spoken previously about the benefits of a lower sun angle, but your positioning in relation to the sun can also make a huge difference. You basically have three choices on a sunny day: you can put sun behind you so that it hits the athletes straight in the face, you can place the sun so that it hits the athletes from the side causing split, lighting, or you can go with the backlighting choice.
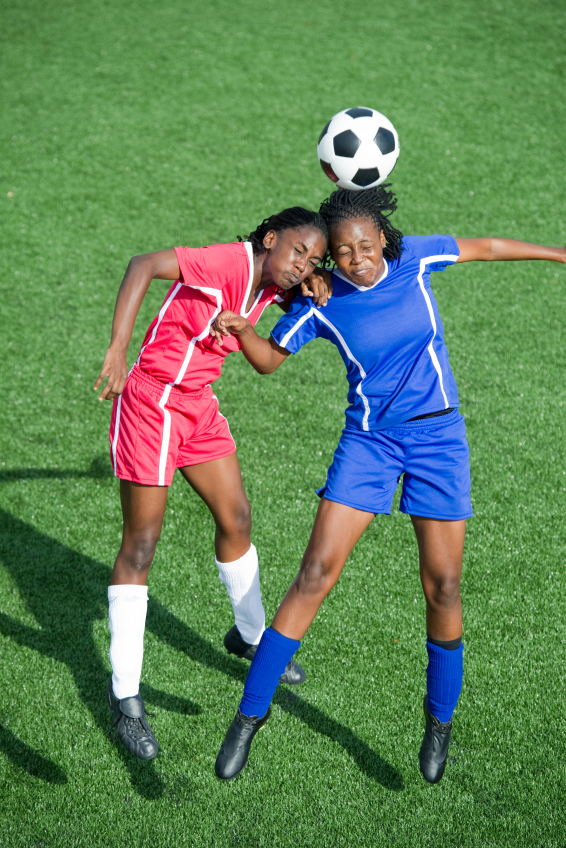
With the backlighting option, the sun is in front of you and backlighting the athlete. Most professional sports photographers choose either front lit or back lit. When the sun is low, having the light hit the athletes straight in the face can be fantastic; you get a fully illuminated face with no shadows. Split light on the other hand is problematic. When half the face is in sun and the other half is in shadow, you have a no-win situation. Not only does it distract from the focus and intensity on the athlete's face, you also can’t win from an exposure perspective. If you expose it so the bright half is correct, then the shadows are too dark. If you adjust so the shadow is correct, now the sunny side is too bright. This forces you to try to correct it afterwards on your computer, which can be difficult and still won’t give you that uniform tone. This is where backlighting can be a solid option.
Backlighting places the sun behind the athlete, giving you a uniform tone on the face. Plus, the sun on the back of the head and body helps separate the athlete from the background like a halo. Perfect. But can you foresee why your camera may have a problem with this decision? You got it. As you aim your camera at the action with the bright sun shining directly at you, your camera is going to compensate for all that bright light and dial down the tone, thus putting the athletes in deep shadow or silhouette. Being a machine, your camera is guessing you want to expose the light correctly, not the things moving around in front of it. This is where you need to trick your camera metering system. It is time to take out your camera manual. The good news is that this is not very difficult. You are simply looking for the Exposure Compensation setting.
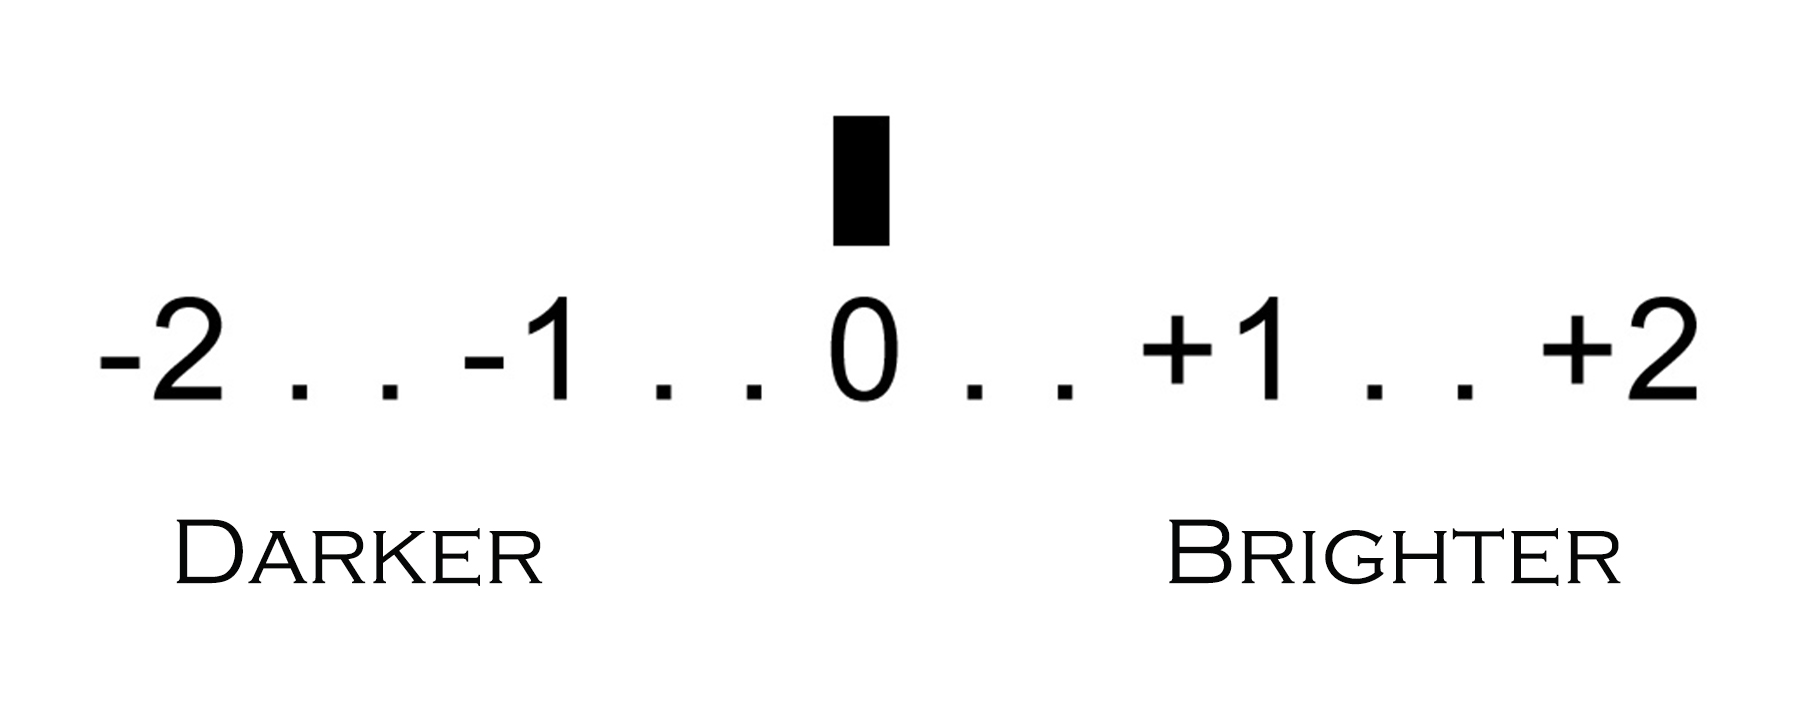 Your camera metering system is striving to give you the correct tone to match the existing light. You are simply going to tell it to make it brighter than it thinks it needs to be. When you find the Exposure Compensation adjustment screen, it will show you a line bar that normally will look something like this: -2 -1 0 +1 +2. The default setting is at 0. You just need to move that needle up to +1 or +2. The numbers represent FStop numbers. Now shoot a backlit photo and the exposure will brighten to allow for those shadows to open up. You are telling the camera to brighten the subjects in the shadows and let the background go a bit brighter. Another bonus to using backlighting is that when the background gets brighter, it serves to isolate the athlete and reduces background clutter. Don’t forget to set it back to 0 once you are finished backlighting, or else all your future photos will look too bright.
There are a few other things to keep in mind when backlighting. Now that the sun is coming straight at you, remember to utilize your sun shade on your lens so that the sun doesn’t hit the front of your glass. You may need to slightly alter your angle to avoid that lens flare. Here's the last tip: get down low. You will notice that lots of sports photographers kneel or sit when they shoot. They do that to make the athletes look larger than life and more imposing. They also get low to minimize the playing field, especially when backlighting. Here's a good example. You have a soccer player dribbling the ball towards you. If you stand, you get a lot of bright sun hitting the field. If you get low, due to the angle, you minimize the field plane and isolate the athlete. Give it a try. You will see a difference.
Get out there, try some different settings and angles, and, as always, have a blast!

Scott Quintard is a professional photographer based in southern California and a 25 year sports photography veteran who specializes in teaching parents and aspiring photographers about how to capture sports imagery. Credits include 12 years as the official team photographer for the UCLA Bruins and a seasoned contributor for NFL Properties, MLB, NBA and NCAA. Scott is a husband and father of three young athletes. See more of Scott's offerings at www.sportspicpro.com.
NEW! Free Sports Organization Resources
All of TeamSnap's ebooks, articles, and stories in one place. Access Now